How to fix Windows 11/10 NVIDIA Control Panel Access denied error
NVIDIA Control Panel is an application included on PCs equipped with NVIDIA GPUs that allows users to change graphics settings. However, some users are unable to change NVIDIA Control Panel options due to an “Access Denied” error. The error message reads, “The selected settings could not be applied to your system.”
The “Access Denied” error is primarily reported for 3D settings. As a result, the NVIDIA Control Panel does not apply (save) the user-selected settings. Here’s how to fix the “Access Denied” error for the NVIDIA Control Panel in Windows 11/10.
Recommendation: How to Fix 504 Gateway Timeout Error
1. Run NVIDIA Control Panel as an administrator
First, try running NVIDIA Control Panel with elevated administrator privileges, which works for some users. To do this, press the Windows logo + S keyboard buttons and enter NVIDIA Control Panel. Right-click NVIDIA Control Panel and select Run as Administrator.
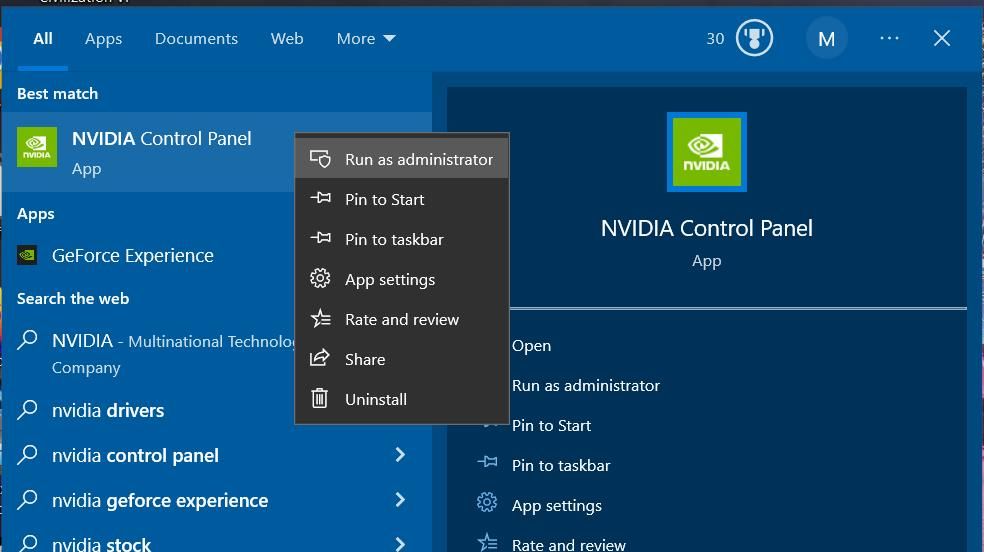
If this potential fix works, it would be best to set the NVIDIA Control Panel to always run with administrative privileges. However, the UWP application is in a protected folder. You need to take ownership of the WindowsApps folder to set permanent administrator privileges for the NVIDIA Control Panel.
If you take ownership of the WindowsApps folder, open the NVIDIACorp subfolder to access the NVIDIA Control Panel files. You will then need to set the nvcplui.exe file to run with administrator privileges. Follow the steps in the How to set an application to always run as an administrator guide to set elevated permissions for the nvcplui.exe file. The path to the NVIDIA Control Panel folder is:
C:\ProgramFiles\WindowsApps\NVIDIACorp.NVIDIAControlPanel_8.1.964.0_x64__56jybvy8sckqj2. Select NVIDIA Control Panel Repair and Reset Options
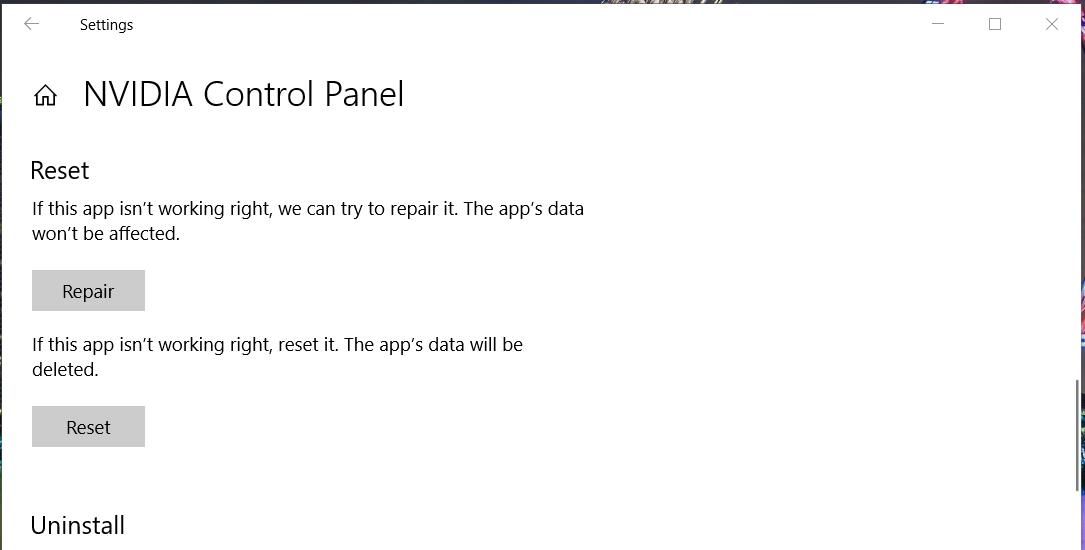
The NVIDIA Control Panel app has Repair and Reset Repair and Reset troubleshooting options you can select in Settings. Both options can be used to repair an app when it isn’t working properly. So, try selecting Repair first and then Reset to clear the app’s data if repair isn’t enough. Check out this article about resetting apps in Windows for more information on how to apply this potential fix.
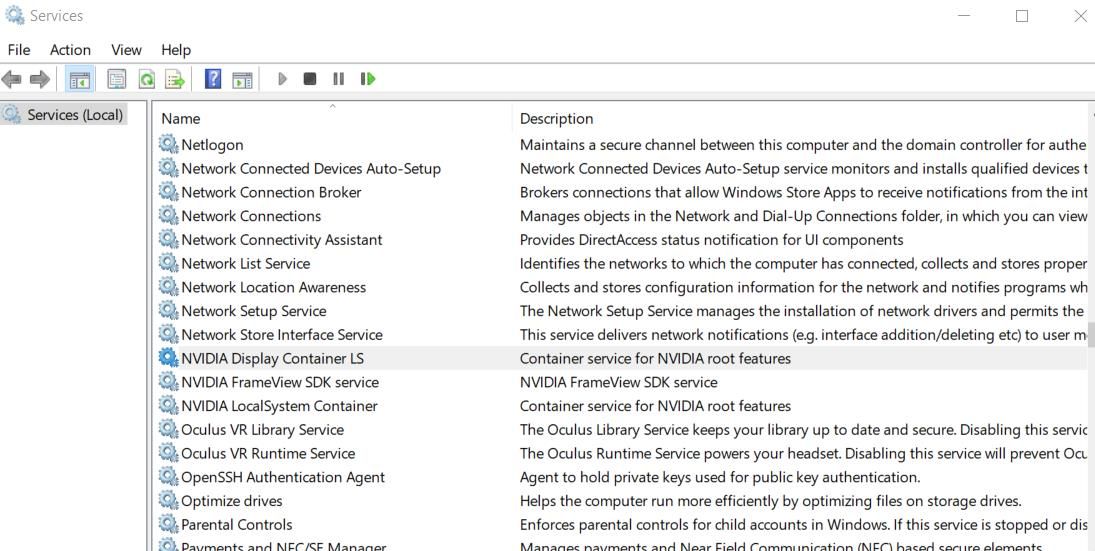
3. Start or restart the NVIDIA display container service
The NVIDIA display container is an important GPU service that runs many other NVIDIA background tasks. Make sure the service is running or restart it if it is running. You can start or restart the NVIDIA Display Container like this:
- Click Type here to search button or the search box on the taskbar to access the Windows File Finder tool.
- Type servicesservices in the file search utility. </li >
- Select services to launch the application.
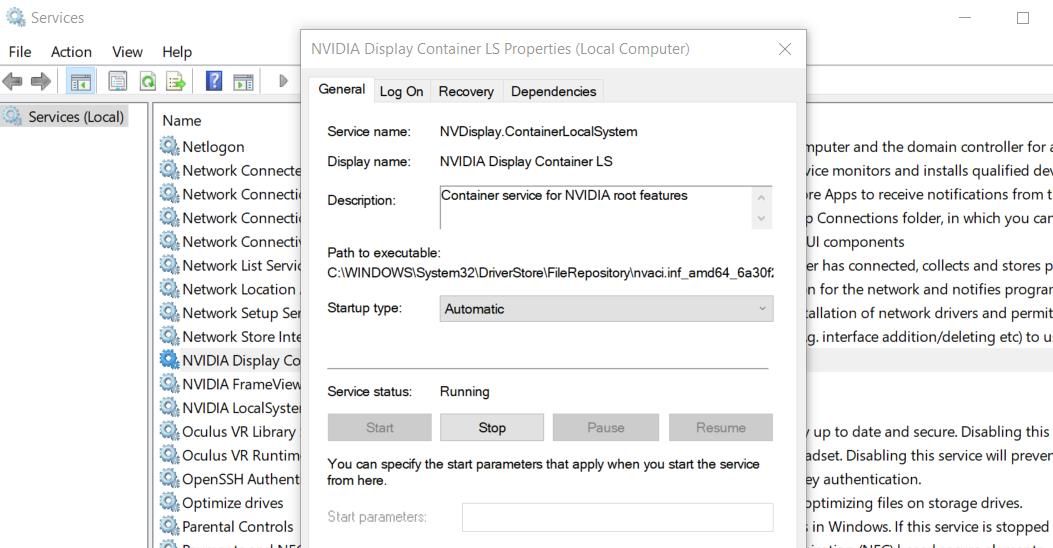
- Then double-click NVIDIA Display Container to view the settings for the service .

Screenshot taken by Jack Slater – No attribution required - Click Startup type menu and select Automatic from there.
- Next, select Start if the NVIDIA Display Container service is stopped. Or Select Stop > Start to restart the service.

- Click Apply Apply to set the settings for the NVIDIA Display Container service.
- Close the NVIDIA Display Container Properties window by clicking OKOK.
Recommended: How to Navigate the TikTok Inbox
4. Update your NVIDIA Graphics Drivers
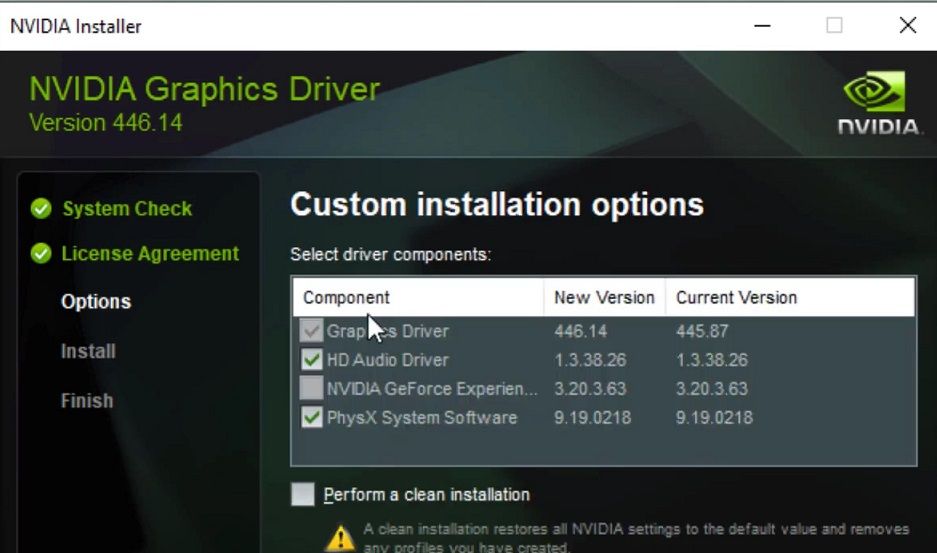
The most widely confirmed fix for the “Access Denied” error is to manually update the NVIDIA graphics drivers. Therefore, this is often caused by outdated or faulty NVIDIA drivers. This guide to updating NVIDIA drivers provides more details on how to apply this potential solution by manually downloading the latest GPU driver from the NVIDIA site.
After downloading the latest NVIDIA driver package for your GPU, open the directory containing its installation files. Double-click the NVIDIA driver package file to view its setup wizard and select Custom option. Then select the Perform a clean installation checkbox and click Next to install.
5. Rollback the NVIDIA driver
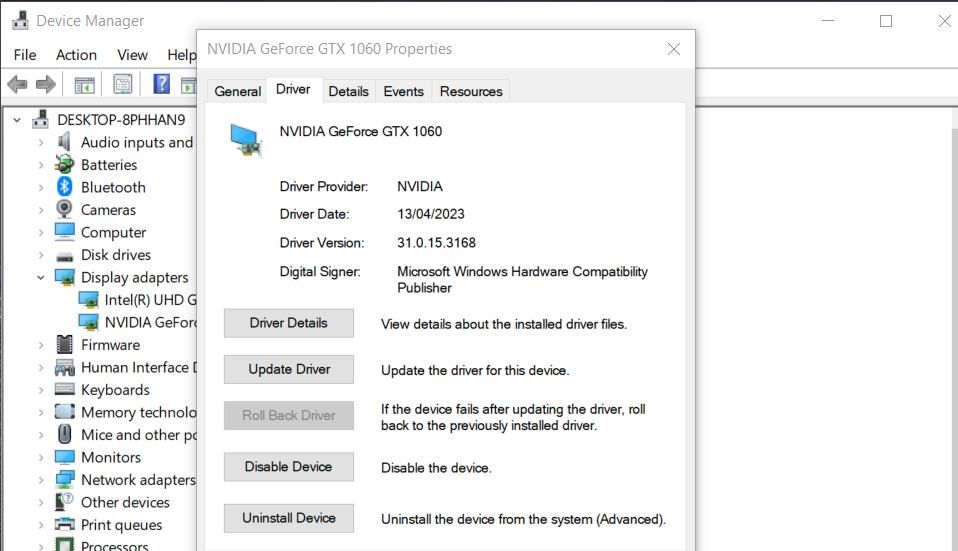
If you get an “Access Denied” error after installing a new NVIDIA driver, rolling the driver back to the previous driver may be a possible potential solution. You can only do this if the previous NVIDIA GPU driver files are still available. Our article on rolling back drivers includes guidance on how to apply this potential fix.
If the Roll BackRollback option is grayed out, you can still use the System Restore utility to roll back to the previous NVIDIA graphics driver. Rolling Windows back to a restore point restores drivers installed before the selected date. However, this only works if your PC has a restore point that predates the driver update.
This post about creating and utilizing restore points tells you how to roll back Windows. Selecting a restore point will restore the previous NVIDIA graphics driver. You can click Scan for affectedScan for affected programs in System Restore to check whether the selected restore point will restore the NVIDIA graphics driver.
6. Restore the previous version of the DRS folder
Some NVIDIA Control Panel users said they fixed the “Access Denied” error by restoring a DRS folder version backup. Note that you will only be able to apply this potential fix if you have File History enabled or a restore point saved on your PC. Here’s how to restore previous DRS folder versions in Windows 11/10:
- First, bring up File Explorer by clicking the taskbar button with the folder library icon.
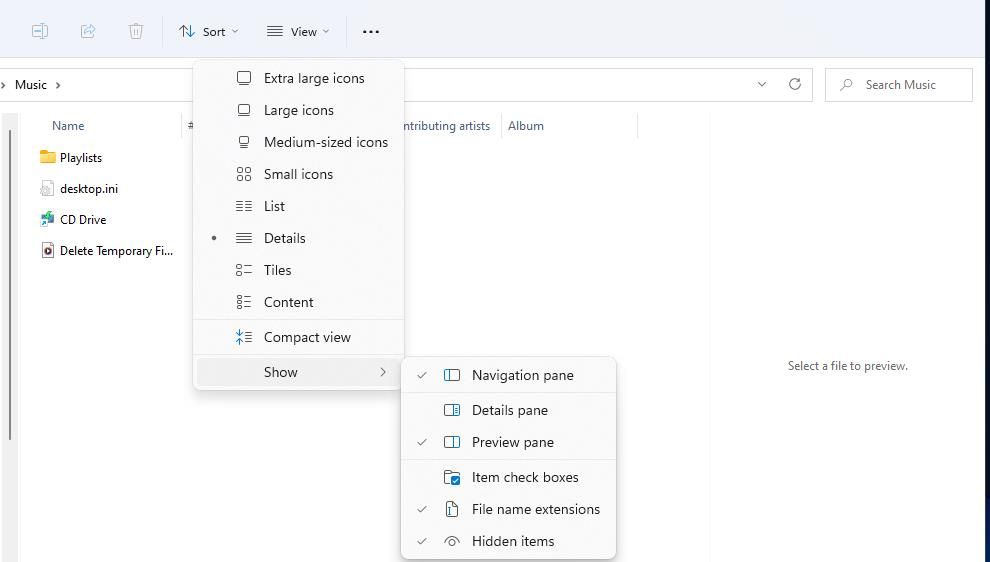
- Then click the ViewView button to select a ShowShow option.
- Select the Hidden Items option.

- Clear the address bar of Explorer and enter the following path:
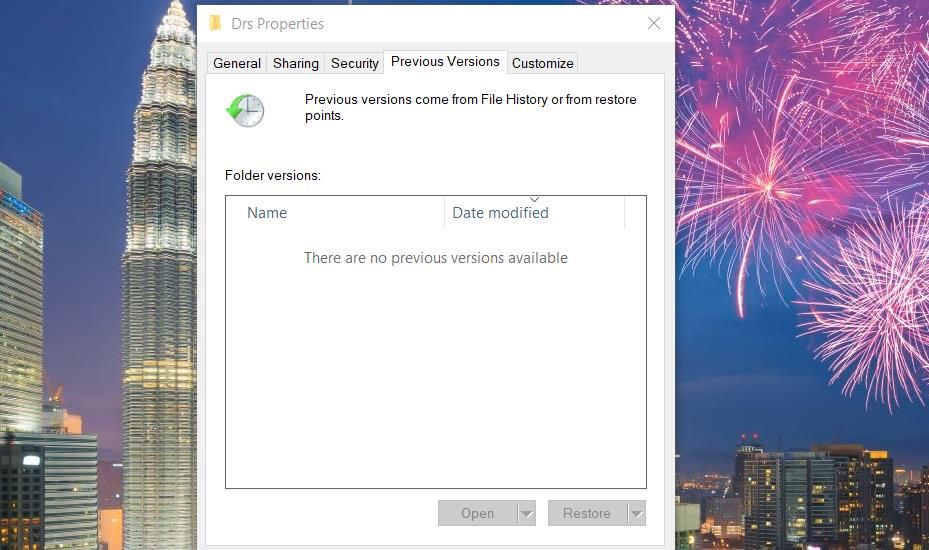
C:\ProgramData\NVIDIA Corporation - Then right-click the DRS folder and select Properties.
- Click Previous Versions</strong > Previous versions tag.

- Select the latest folder version shown in this tab.
- Click Restore< strong>Restore button.
To select the same Hidden Items > Options in Windows 10, you need to open the View tab in Explorer. Then check the box labeled Hidden Items Hide items on this tab.
7. Turn off the Game Bar
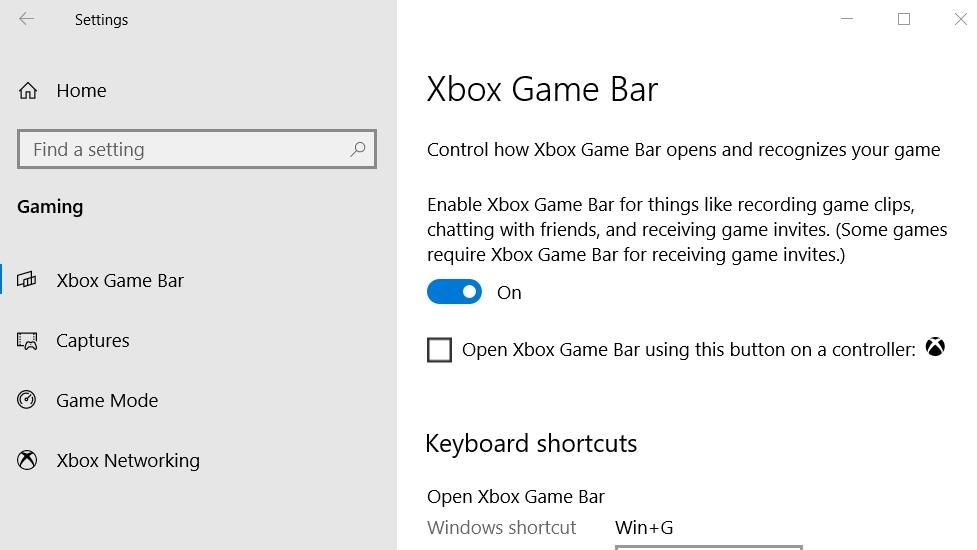
It is also recommended to turn off the Game Bar to prevent any issues with the NVIDIA Control Panel. This potential solution is more applicable to Windows 10, as the Windows 11 Settings app does not include a specific option to disable the Game Bar. You can turn off the Game Bar in Windows 10 like this:
- Open Settings by clicking the gear icon on the Start menu.
- Click Gaming Games category.
- Then turn off the Enable Xbox Game Bar option.

Change settings in the NVIDIA Control Panel again
Many users have resolved the NVIDIA Control Panel “Access denied” issue with the potential fix above. Denied” error. So, there is a high chance that one of them will also fix the issue on your PC. After resolving the issue, you can change all the settings in the NVIDIA Control Panel as needed.

