
6 Ways to Crop Images in Microsoft Excel
If you need to quickly crop an image without using graphic design tools, you can do it in Microsoft Excel. Read this guide to the end to learn all the tips for cropping pictures in Excel.
In today’s data-driven world, Microsoft Excel is an indispensable tool for professionals in all walks of life. From complex calculations to insightful data visualizations, Excel offers a variety of features to enhance your workflow.
But did you know that Excel is not just for numbers and tables? Excel also allows you to work with images, and one essential skill in your Excel toolkit is image cropping.
Whether you’re creating reports and presentations, or just want to trim an image to fit a cell, knowing how to crop an image in Excel can significantly improve the visual appeal of your document. In this comprehensive guide, I’ll walk you through the process of cropping images in Excel.
Recommended: How to Fix No Sound or Text Message Alerts on iPhone
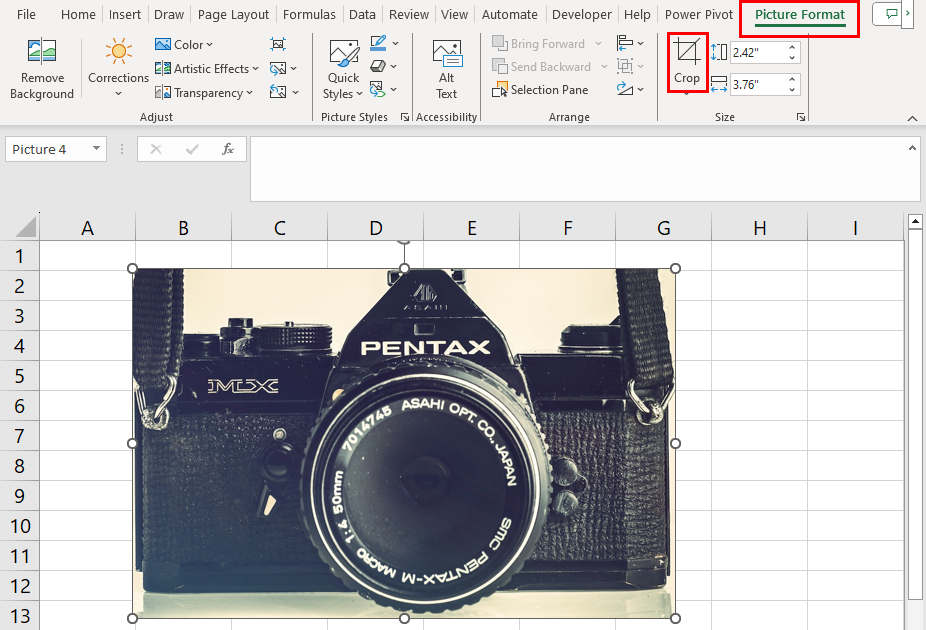
What is the Crop tool in Excel? Where is it?
The Crop tool in Excel is part of the Size command block. It is on the Picture Format tab. It is available only when you add an image to an Excel worksheet.
The Excel Crop tool has the following features:
- Crop: Enables you to crop the image margins.
- Crop to Shape: This allows you to fit the inserted image into a shape object in Excel.
- Aspect Ratio: Changes the image aspect ratio to Portrait, Landscape, and Square modes.
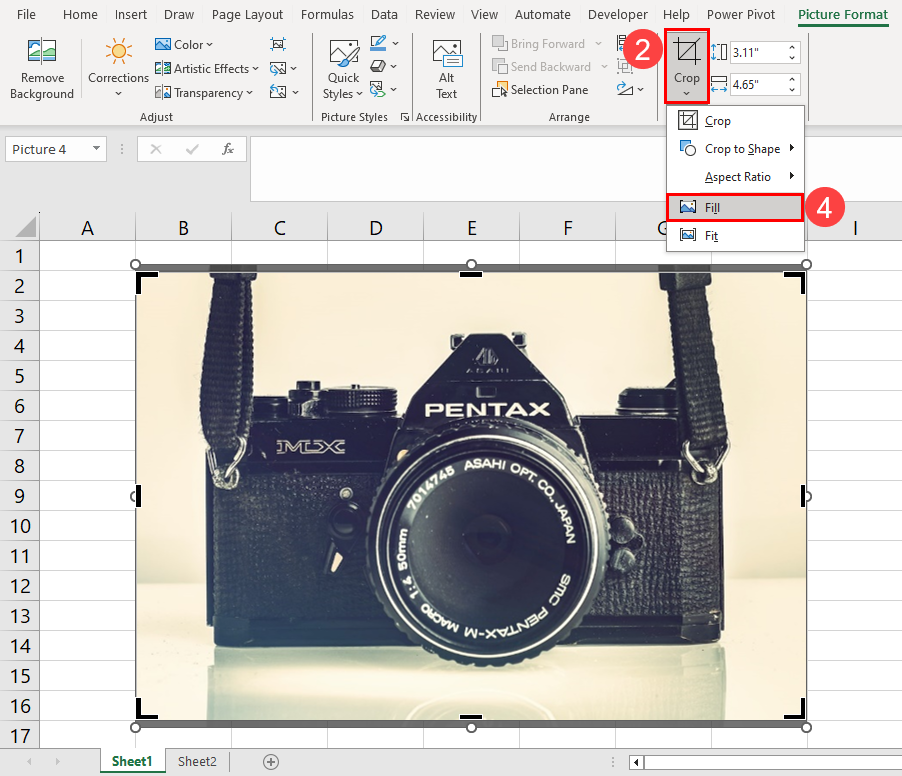
- Fill: It resizes the picture on the Excel worksheet so that the image fits the entire image object space.
- Fit: This tool edits the image size so that it fills the entire image object space without changing the aspect ratio.
There are three main ways to access the cropping tool in Excel, as shown below:
From the right-click menu

- Select the image on the worksheet.
- Right-click on it.
- Click the Crop button above the right-click context menu.
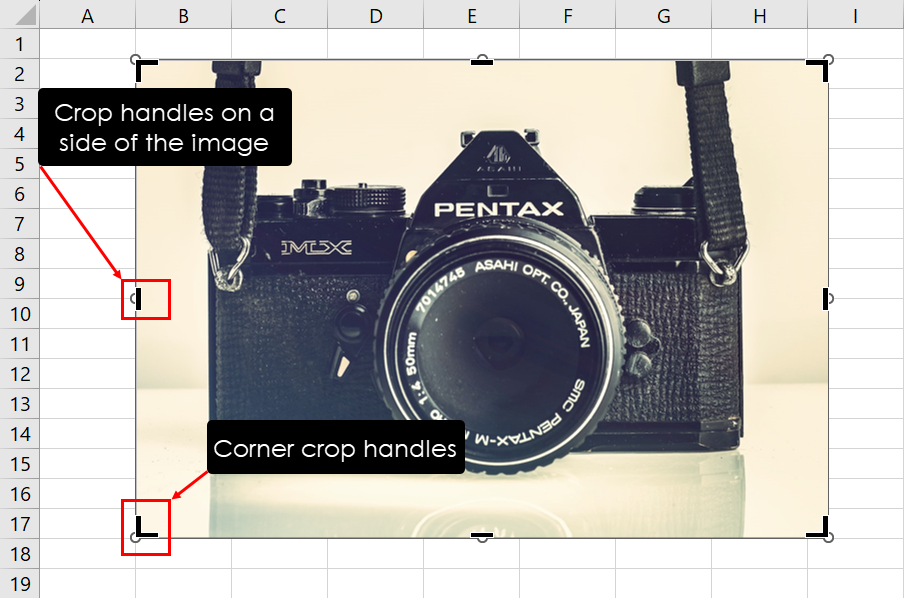
- Black cropping handles appear at the corners and sides of the image.
When cropping, you can use the following cropping controls:
- Drag from a corner to crop the image from both sides.
- Drag a side cropping handle to crop the image from one side.
- Press Ctrl and drag a side or corner cropping handle to crop evenly from opposite sides.
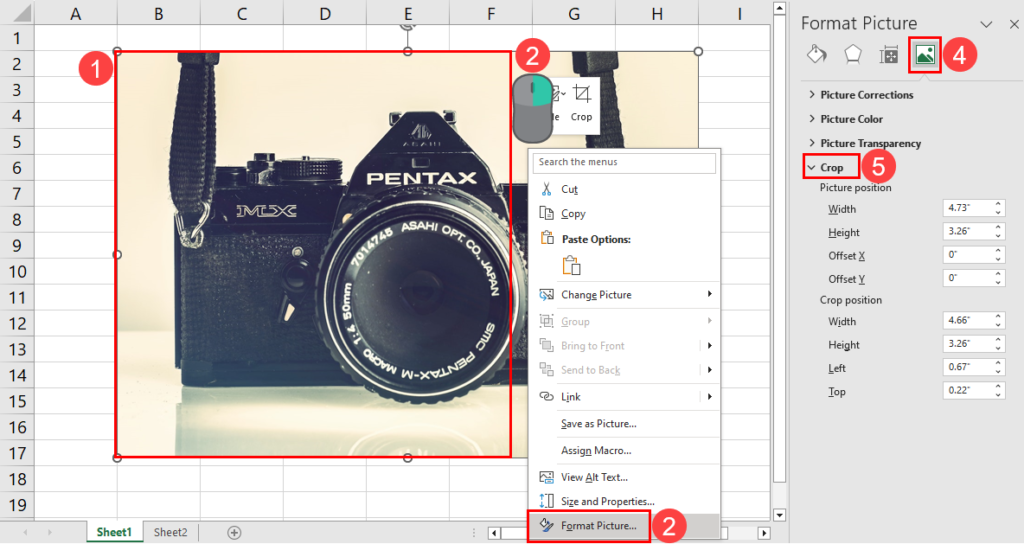
On the “Format Picture Navigation Panel”
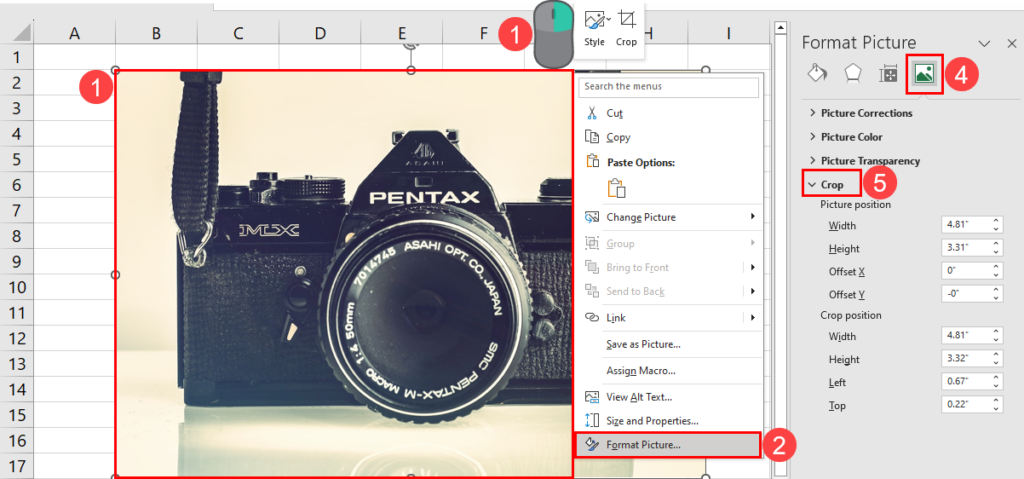
- Select the image and right-click.
- Click on the Format Picture option at the bottom of the context menu.
- The Format Picture navigation panel will appear on the right.
- There, click on the fourth tab or the Picture tab.
- The fourth option on the Picture tab is the Crop tool.
- Expand the Crop menu to find a variety of manual cropping options.
Recommendation: How to Get Linux Features with Windows Apps
From the Excel ribbon menu
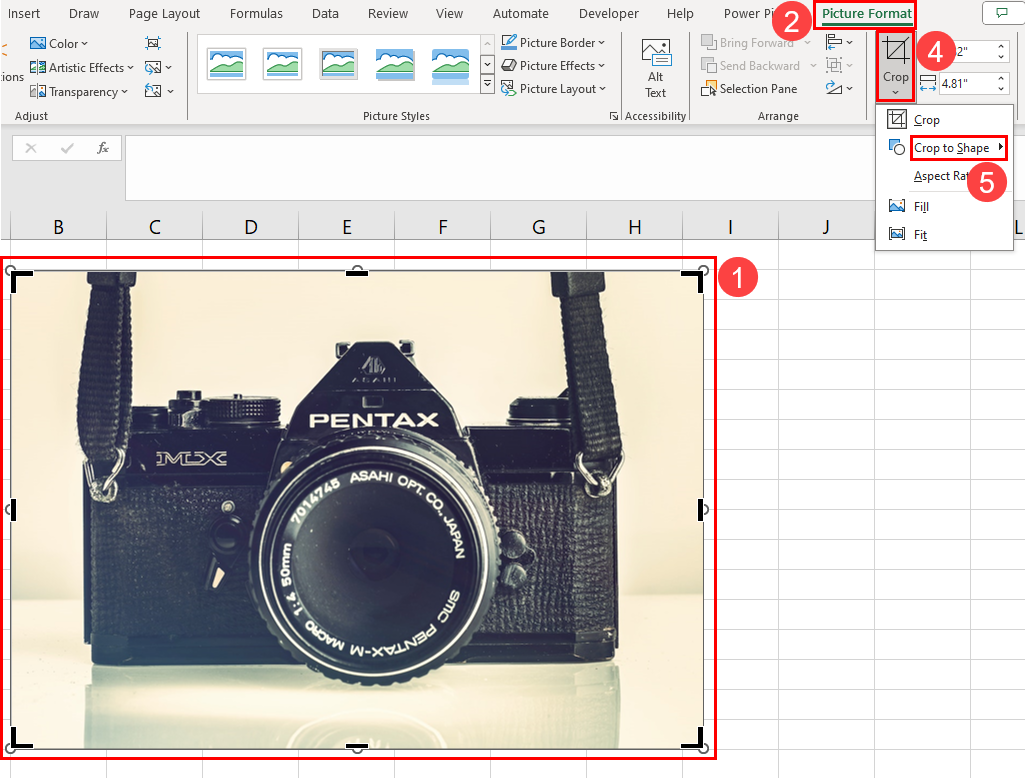
- Highlight the image on the Excel worksheet.
- Excel will automatically open and select the Picture Format tab on the ribbon menu.
- Go to the Size command block on the Picture Format tab.
- Click the Crop button to activate the crop handles.
- Or, you can click the Crop drop-down menu menu to find advanced cropping options, such as Crop to shape, Aspect ratio, ETC.
Reasons to crop images in Excel
There are many reasons to crop images in Excel, and cropping images is a valuable skill for a variety of purposes. Here are some of the main reasons to crop images in Excel:
- Crop images to remove unwanted or distracting elements, resulting in a cleaner, more visually appealing document.
- Crop images to fit neatly into a cell or designated area, optimizing space on your spreadsheet.
- Crop images to highlight specific details, making it easier for readers to understand the content.
- You can also crop images and remove the cropped portions to reduce the size of your final workbook.
- Crop images to align with other elements on your worksheet, ensuring a consistent and professional look.
- Crop images to create custom shapes or sizes that match your organization’s branding or specific design requirements.
- If you don’t have access to a graphic design tool but need to crop an image, Excel is your best choice.
- Crop images to fit your specific report, presentation, or worksheet, enhancing its overall impact.
Crop image margins in Excel
This is the general method of cropping. You just need to right-click on the image and select Crop to activate this mode.
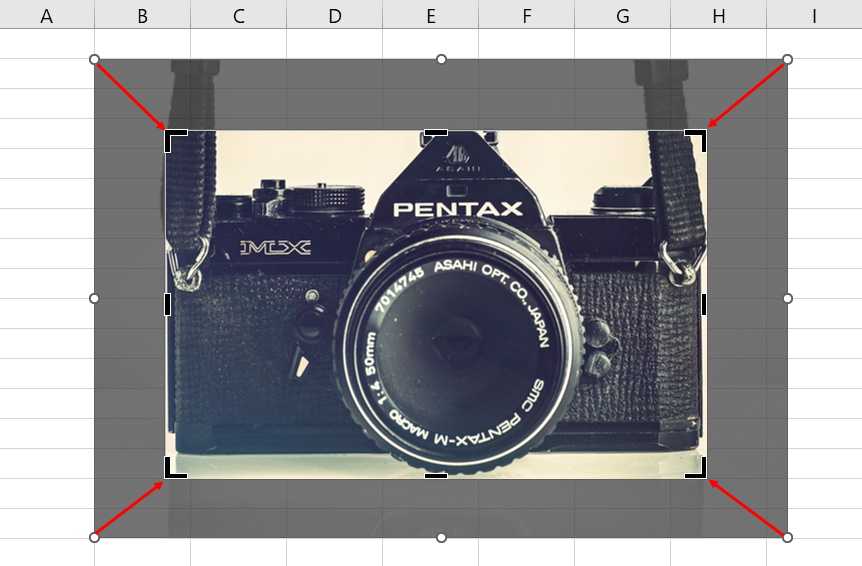
You can now drag the side cropping handles from the edge to the center of the image. This will allow you to reduce the margins of the image, as shown in the screenshot above.
Once you have completed the cropping process, click the Crop button. This will resize the image so that it lines up with the crop overlay.
Recommended: How to Fix Windows Roblox The Application Encountered an Unrecoverable Error
Crop to Shapes in Excel
This Crop to Shapes feature in Excel is a powerful tool that allows you to crop images into predefined shapes. This gives your Excel worksheet images a customized and beautiful look.
With this feature, you can quickly and easily convert rectangular images into various shapes, such as circles, triangles, stars, arrows, and more.
It is particularly useful when you want to create eye-catching visuals for reports, presentations, or other documents.
The Crop to Shape feature allows you to work with the following Excel shape objects:
- Rectangle
- Basic Shapes
- Equation Shapes
- Flowchart
- Arrow Blocks
- Callouts
- Stars and Flags
Here is a step-by-step guide to using the Crop to Shape feature in Excel:
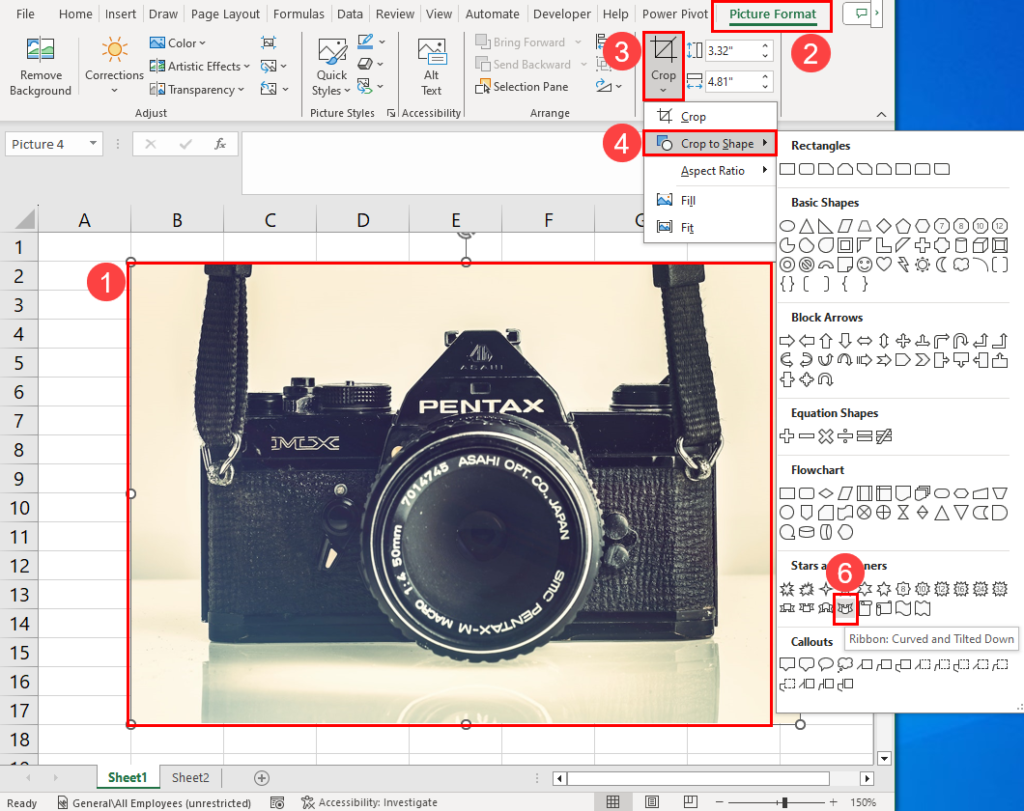
- Select the image to be cropped using the Crop to Shape feature.
- Go to the Picture Format tab on the ribbon at the top of the Excel window.
- In the Size group, find and click the Crop button. A drop-down menu will appear.
- Select Crop to Shape from the drop-down menu.
- A submenu with various shape options will appear.
- Select the shape you want to crop the image to, for example, a ribbon, by clicking on it.
- Excel automatically crops the image to the selected shape.
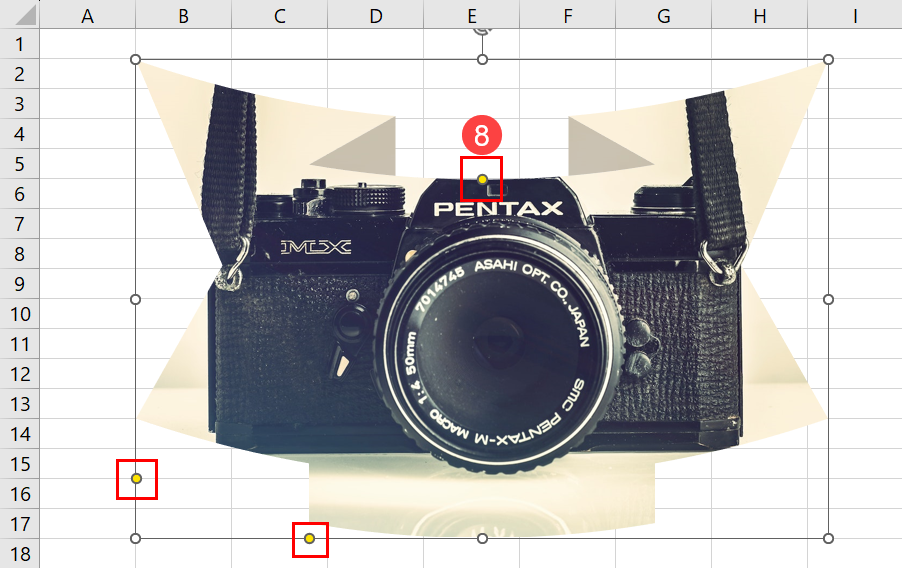
- You can further adjust the size and position of the cropped image by clicking and dragging the shape’s handles.
- These are the little yellow dots on the edge of the cropped image.
- Once you’re happy with the cropped image, click outside the image to apply the changes.
Recommended: WordPress Free Market Directory Theme Workreap
Crop to Fit or Fill Shapes in Excel
Suppose the picture object frame is larger than the image you imported. In this case, you can use the “Fit” or “Fill” function of the crop tool. Here’s how to do it:
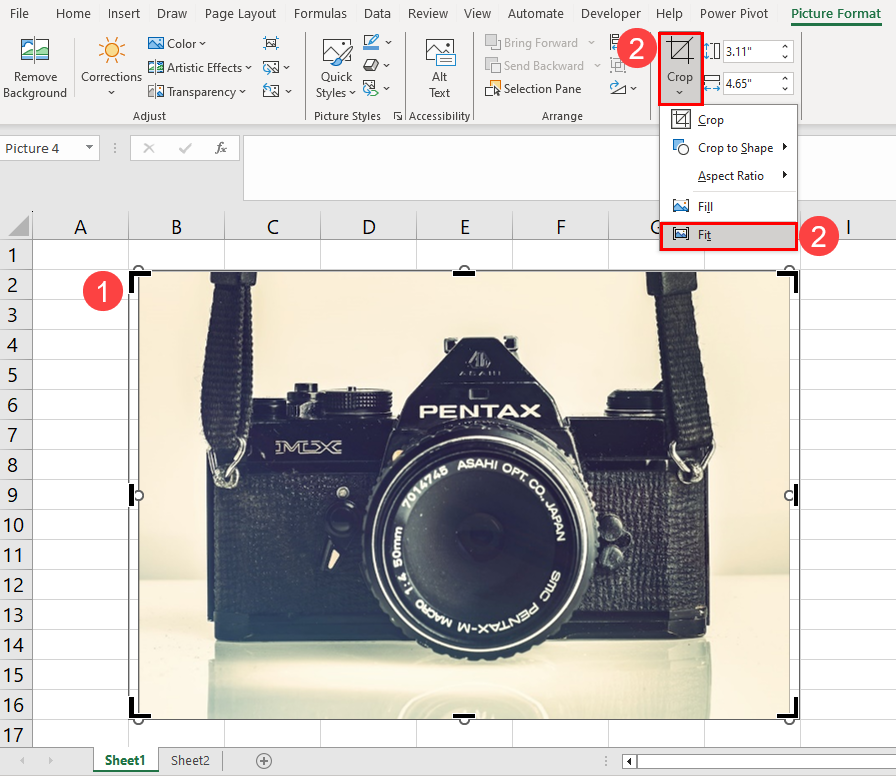
- Select the image you want to fit or fill the picture frame.
- Click the Crop drop-down menu and select Fit.
- Excel will enlarge the image so that it fills the picture frame as much as possible while maintaining the aspect ratio.
- Alternatively, you can click Fill to Fill.
- In this mode, Excel will enlarge the image to fit the entire picture frame and crop the image area outside the picture frame.
Recommended: How to Get Windows Widgets to Monitor Hardware Usage
Crop to fit aspect ratio in Excel
The aspect ratio feature of crops in Excel allows you to crop an image while maintaining its original proportions or aspect ratio.
This means that when you crop an image, it will retain its aspect ratio, preventing distortion.
This feature is useful when the image you want to crop has a specific aspect ratio requirement. For example, you need to resize an image to a 16:9 aspect ratio in landscape mode. Excel can help you achieve this.

To use this feature, highlight an image on your worksheet. Now, click on Crop and hover your mouse cursor over the Aspect Ratio field. Now, just select the aspect ratio you want.
How to manually crop an image using the Crop tool
Suppose you need to crop an image in Excel with unique values for various cropping features like Picture Position, Offset X, Offset Y, and Crop Position.
You can use the Crop tool in the Format Picture navigation panel to do this type of custom cropping of an image. Here are the instructions you can follow:
- Select the picture you need to crop using the custom values for the crop function.
- Now, right click and select Format Picture at the bottom of the context menu.
- The Format Picture panel should open on the right.
- Click the Image tab.
- Expand the Crop menu.
- You should now see various values for the following image properties:
- Image Position
- Crop Position
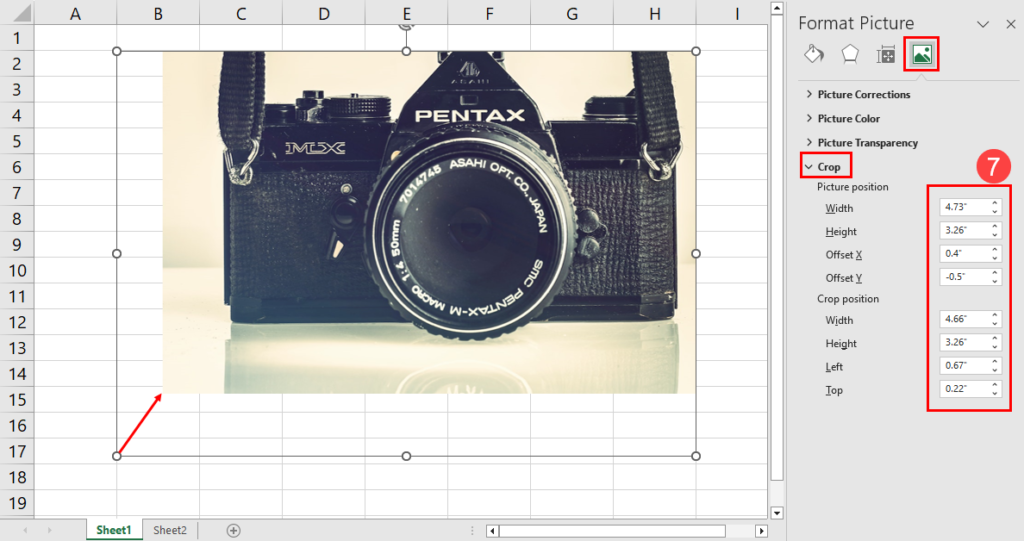
- Enter the values required for the final cropped image in the above fields.
- Excel will resize the selected email in real time.
Crop Images in Excel Using Excel VBA
Excel VBA enables you to automate the image cropping process in Excel. Using this method, you can crop thousands of images in a flash. All you need to do is enter the image details in the Excel VBA script and VBA will do the rest. This method is especially suitable when you frequently crop images on your Excel workbook.
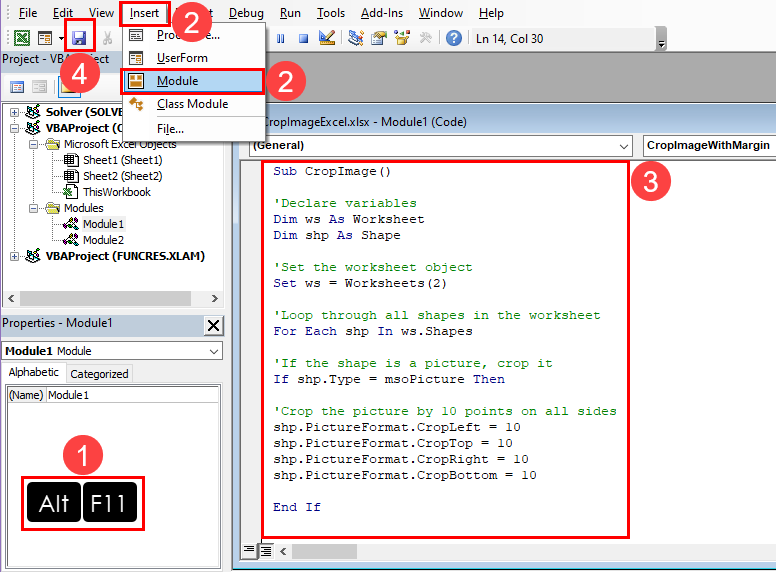
Following is the Excel VBA script and the steps to implement the code in a worksheet:
- Open the Excel VBA Editor tool by pressing Alt + F11 on the keyboard.
- Click the Insert button and select Module.
- In the new module that pops up in the Excel VBA background, copy and paste this code:
Sub CropImage() 'Declare variables Dim ws As Worksheet Dim shp As Shape 'Set the worksheet object Set ws = Worksheets(2) 'Loop through all shapes in the worksheet For Each shp In ws.Shapes 'If the shape is a picture, crop it If shp.Type = msoPicture Then 'Crop the picture by 10 points on all sides shp.PictureFormat.CropLeft = 10 shp.PictureFormat.CropTop = 10 shp.PictureFormat.CropRight = 10 shp.PictureFormat.CropBottom = 10 End If Next shp End Sub - Click the Save button.
- Close the Excel VBA Editor tool.

To run the script, follow these steps:
- To bring up the Macros dialog box, press Alt + F8 keys.
- Select the Crop Picture macro.
- Click Run to execute the code.
If needed, customize the script as follows:
Worksheets(2): Change according to the worksheet number, e.g.Worksheets(1)for Worksheet1, and so on.shp.PictureFormat.CropLeft = 10: Change the value in this code element to increase or decrease the crop margin. The same applies to the remaining three code elements, such asCropTop,CropRight, andCropBottom.
Conclusion
Excel’s image editing capabilities may be overlooked, but it contains powerful picture editing features, including different types of cropping. In Excel, you can use a variety of cropping, such as margins, shapes, aspect ratios, and more.
So far, I have explained and demonstrated all the popular and common methods to crop images in Excel. In addition to the manual methods, I also introduced an automated method using Excel VBA.
You can try these methods on your own to make your Excel reports more professional. Not to mention, you can significantly reduce the size of your workbook by cropping images, especially when there are a lot of pictures in your Excel file.
Did the above method of cropping pictures in Excel help you? Do you know another method that you think will be helpful to others? Write your thoughts in the comment box below.