如何在Weebly站点中添加垂直选项卡小部件
我们在上一篇文章中讨论了如何添加水平选项卡,在本文中我们将讨论如何在 Weebly建站站点中添加垂直选项卡小部件。 与水平选项卡类似,垂直选项卡也用于在有限的空间内添加大量内容。 该小部件仅使用 CSS 制作,易于添加到您的 Weebly 网站。
推荐:如何在Windows PC上安装Google地图
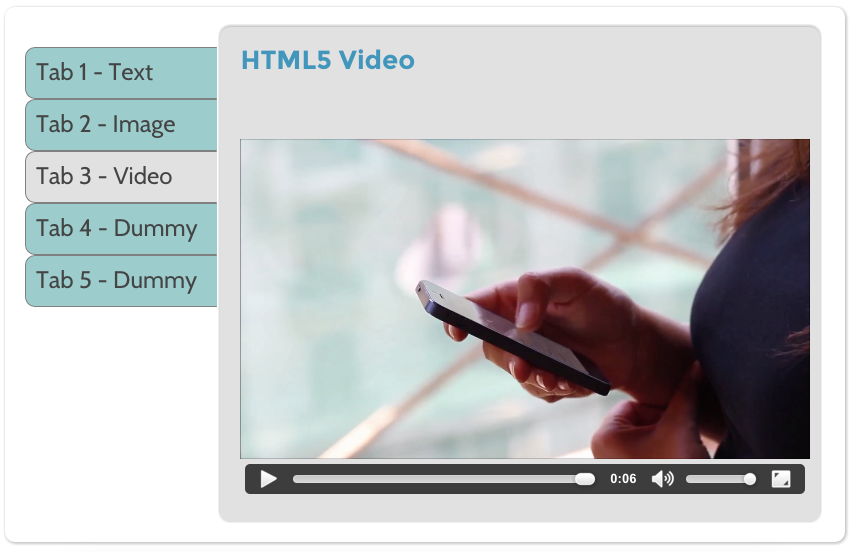
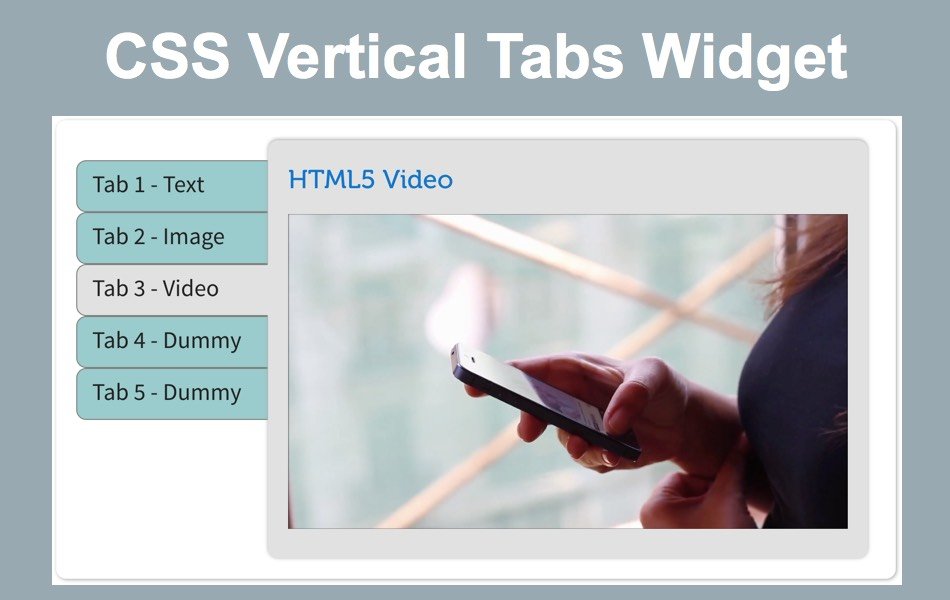
它看起来如何?
该小部件将如下所示:

垂直标签的 CSS
基本上,小部件包含三个部分——完整容器、垂直导航标签和选项卡内容。
- 无序列表用于导航,列表样式为 none,nth-child 属性用于定义垂直菜单中的五个选项卡。 您可以根据需要修改 CSS 并添加更多或更少数量的选项卡。
- 单选输入类型用于隐藏所有非活动选项卡内容并突出显示活动选项卡内容。
- 导航部分定义为 24%,选项卡内容定义为 75%,您可以更改。
- 您还可以根据需要更改背景颜色和悬停颜色。
下面是垂直选项卡小部件的完整 CSS,该小部件将添加到您的Weebly建站网站的“标题代码”部分下。
<style>

/* Start of Tab Container */
#tab-container{
position:relative;
margin: 20px auto;
width: 800px;
border-radius: 10px;
box-shadow: 1px 1px 5px #aaa;
padding: 20px;
background:#fff;
}

/* Start of Navigation Menu */
input[type=radio]{
display:none;
}
label{
cursor:pointer;
padding-left: 20px;
line-height: 2;
}
nav{
position:relative;
display:inline-block;
width: 24%;
}
nav ul{
list-style:none;
margin:20px 0 0 0;
padding:0;
}
nav ul li{
position:relative;
height: 50px;
font-size: 20px;
padding-top:10px;
font-weight:bold;
line-height: 30px;
border-style:solid;
border-width:1px;
border-color: gray transparent gray gray;
border-radius: 10px 0 0 10px;
background: #99CCCC;
}
nav ul li:hover{
background:#efefef;
z-index:1;
color: rgb(50, 50, 50);
}
nav ul li:nth-child(1):hover::before{
border-color: #e1e1e1;
}
nav ul li:nth-child(1)::before{
tab-content:"";
position:absolute;
border-style:solid;
border-width:5px;
border-color: #aaa;
top:-10px;right:-1px;
}
nav ul li:nth-child(1)::after{
tab-content:"";
position:absolute;
border-style:solid;
border-width:5px;
border-color: #fff;
top:-11px;right:0px;
border-radius: 0 0 10px 0;
box-shadow: 1px 1px 0px gray
}
nav ul li:nth-child(5):hover::before{
border-color: #e1e1e1;
}
nav ul li:nth-child(5)::before{
tab-content:"";
position:absolute;
border-style:solid;
border-width:5px;
border-color: #aaa;
bottom:-10px;right:-1px;
}
nav ul li:nth-child(5)::after{
tab-content:"";
position:absolute;
border-style:solid;
border-width:5px;
border-color: #fff;
bottom:-11px;right:0px;
border-radius: 0 10px 0 0;
box-shadow: 1px -1px 0px gray
}

/* Start of Tab Content */
#tab-content{
position:relative;
display:inline-block;
background: #e1e1e1;
vertical-align:top;
border-radius: 10px;
width:75%;
box-shadow: 0 -1px 4px #aaa;
}
#tab-content p{
padding: 15px;
font-size: 20px;
line-height: 30px;
}
#tab-content .div{
position:relative;
display:none;
padding: 20px;
}

/* Define Active Navigation Label and Tab Content */
#tab1:checked~ #tab-content .div:nth-child(1),
#tab2:checked~ #tab-content .div:nth-child(2),
#tab3:checked~ #tab-content .div:nth-child(3),
#tab4:checked~ #tab-content .div:nth-child(4),
#tab5:checked~ #tab-content .div:nth-child(5){
display:inline-block;
}
#tab1:checked~ nav ul li:nth-child(1),
#tab2:checked~ nav ul li:nth-child(2),
#tab3:checked~ nav ul li:nth-child(3),
#tab4:checked~ nav ul li:nth-child(4),
#tab5:checked~ nav ul li:nth-child(5){
background:#e1e1e1;
z-index:1;
}
#tab1:checked~ nav ul li:nth-child(1)::before,
#tab2:checked~ nav ul li:nth-child(2)::before,
#tab3:checked~ nav ul li:nth-child(3)::before,
#tab4:checked~ nav ul li:nth-child(4)::before,
#tab5:checked~ nav ul li:nth-child(5)::before{
border-color:#e1e1e1;

</style>推荐:如何在Safari中查看网页源CSS和HTML
垂直选项卡小部件的 HTML
完整的 HTML 内容包含在带有“tab-content”类的 div 标记中,每五个选项卡的内容都包含在使用“div”类的单个 div 下。 用您自己的内容替换内容并将其粘贴到您的Weebly建站网站上的“嵌入代码”元素中。
<div id="tab-container"> <!-- Start of Navigation Labels --> <input type="radio" name="check" id="tab1" checked=checked> <input type="radio" name="check" id="tab2"> <input type="radio" name="check" id="tab3"> <input type="radio" name="check" id="tab4"> <input type="radio" name="check" id="tab5"> <nav> <ul> <li><label for="tab1">Tab 1 - Text</label></li> <li><label for="tab2">Tab 2 - Image</label></li> <li><label for="tab3">Tab 3 - Video</label></li> <li><label for="tab4">Tab 4 - Dummy</label></li> <li><label for="tab5">Tab 5 - Dummy</label></li> </ul> </nav> <!-- Start of Tab Content --> <div id="tab-content"> <!-- Content for 1 Tab --> <div class="div"> <h1>Text Content</h1> <p>Lorem ipsum dolor sit amet, consectetur adipiscing elit, sed do eiusmod tempor incididunt ut labore et dolore magna aliqua. Ut enim ad minim veniam, quis nostrud exercitation ullamco laboris nisi ut aliquip ex ea commodo consequat.</p> <p>Lorem ipsum dolor sit amet, consectetur adipiscing elit, sed do eiusmod tempor incididunt ut labore et dolore magna aliqua. Ut enim ad minim veniam, quis nostrud exercitation ullamco laboris nisi ut aliquip ex ea commodo consequat.</p> </div> <!-- Content for 2 Tab --> <div class="div"> <h1>Image</h1> <img src="https://img.webnots.com/2015/11/parallax1.jpg" width="570" height="400"> </div> <!-- Content for 3 Tab --> <div class="div"> <h1>HTML5 Video</h1> <video width="570" height="400" controls autoplay> <source src="https://img.webnots.com/2015/06/Slider-Video.mp4" type="video/mp4"> </video> </div> <!-- Content for 4 Tab --> <div class="div"> <h1>TAB 4</h1> <p>Lorem ipsum dolor sit amet, consectetur adipiscing elit, sed do eiusmod tempor incididunt ut labore et dolore magna aliqua. Ut enim ad minim veniam, quis nostrud exercitation ullamco laboris nisi ut aliquip ex ea commodo consequat.</p> <p>Lorem ipsum dolor sit amet, consectetur adipiscing elit, sed do eiusmod tempor incididunt ut labore et dolore magna aliqua. Ut enim ad minim veniam, quis nostrud exercitation ullamco laboris nisi ut aliquip ex ea commodo consequat.</p> </div> <!-- Content for 5 Tab --> <div class="div"> <h1>TAB 5</h1> <p>Lorem ipsum dolor sit amet, consectetur adipiscing elit, sed do eiusmod tempor incididunt ut labore et dolore magna aliqua. Ut enim ad minim veniam, quis nostrud exercitation ullamco laboris nisi ut aliquip ex ea commodo consequat.</p> <p>Lorem ipsum dolor sit amet, consectetur adipiscing elit, sed do eiusmod tempor incididunt ut labore et dolore magna aliqua. Ut enim ad minim veniam, quis nostrud exercitation ullamco laboris nisi ut aliquip ex ea commodo consequat.</p> </div> </div> </div>
您可以在每个选项卡内容中添加任何类型的 HTML 标记,如文本、图像、视频等,但确保控制元素的宽度和高度以调整选项卡内容区域内的显示。

